FormEmailer
Fork of Henrique Abreu's FormEmailer for Google Sheets
FormEmailer
This is a fork of Henrique Abreu’s FormEmailer for Google Forms / Sheets. This fork includes UI updates to Henrique’s script, with the deprecation of UiApp. His original project can be found here: https://sites.google.com/site/formemailer/form-emailer
This script integrates directly with a Google Sheet that holds Google Form responses. Once installed on the spreadsheet containing form responses, this add-on will automatically send notification emails containing the form responses. There are several configuration values to help you customize the emails, which are detailed below
Table of Contents
- Getting Started
- Configuration
- Formatting
- Formulas Location
- Report Issues with FormEmailer
- Support this Project
Getting Started
Please download the zip file here
- Unzip the downloaded file (FormEmailer.zip)
- In the Google Sheet you want FormEmailer installed in, click “Tools” > “Script Editor” to open the scripts editor in a new tab.
- Select “File” > “New” > “HTML file”. Create 4 files like this, with the following names (make sure these are spelled correctly):
- about
- settings
- install
- fix-sheet Once done, you should see 5 files on the lefthand side of the editor:
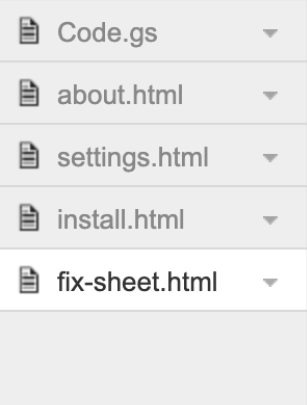
-
Copy / paste the contents of each file in the attached zip file into the corresponding files. The easiest way to do this is by opening up each file in a text editor, selecting all text (Ctrl+a) and copying it. Then, in the script editor, select all text, delete it, and then paste the file contents. Make sure you save each file as you paste contents in.
-
Close the script editor, and refresh your spreadsheet.
Upgrade Versions
If your spreadsheet already has a previous version of FormEmailer running, setup your files in Getting Started and then follow the steps below.
- Click “FormEmailer” > “Settings”
- You should see a prompt asking if you would like to update your version of FormEmailer
- Select “OK”. Please note your previous settings will be overwritten. If you can find any fields you want to re-use in the FormEmailer Cell B3 (Settings Cell), copy them and set aside. Then, when the version upgrade goes through, you can paste those values back into the Settings UI (“FormEmailer” > “Settings”). You can now proceed to the Time-Trigger Installation section.
Installation
Once you have copied the script contents over, you should see a new menu at the top of your spreadsheet called “FormEmailer”. If you select this menu, click the “Install” button on the drop down that appears.
An OAuth screen will open in a new tab for you to grant necessary permissions to FormEmailer. Please note: this script is not officially published through the Chrome Webstore; as a result, you will see the following screen after OAuth submission:
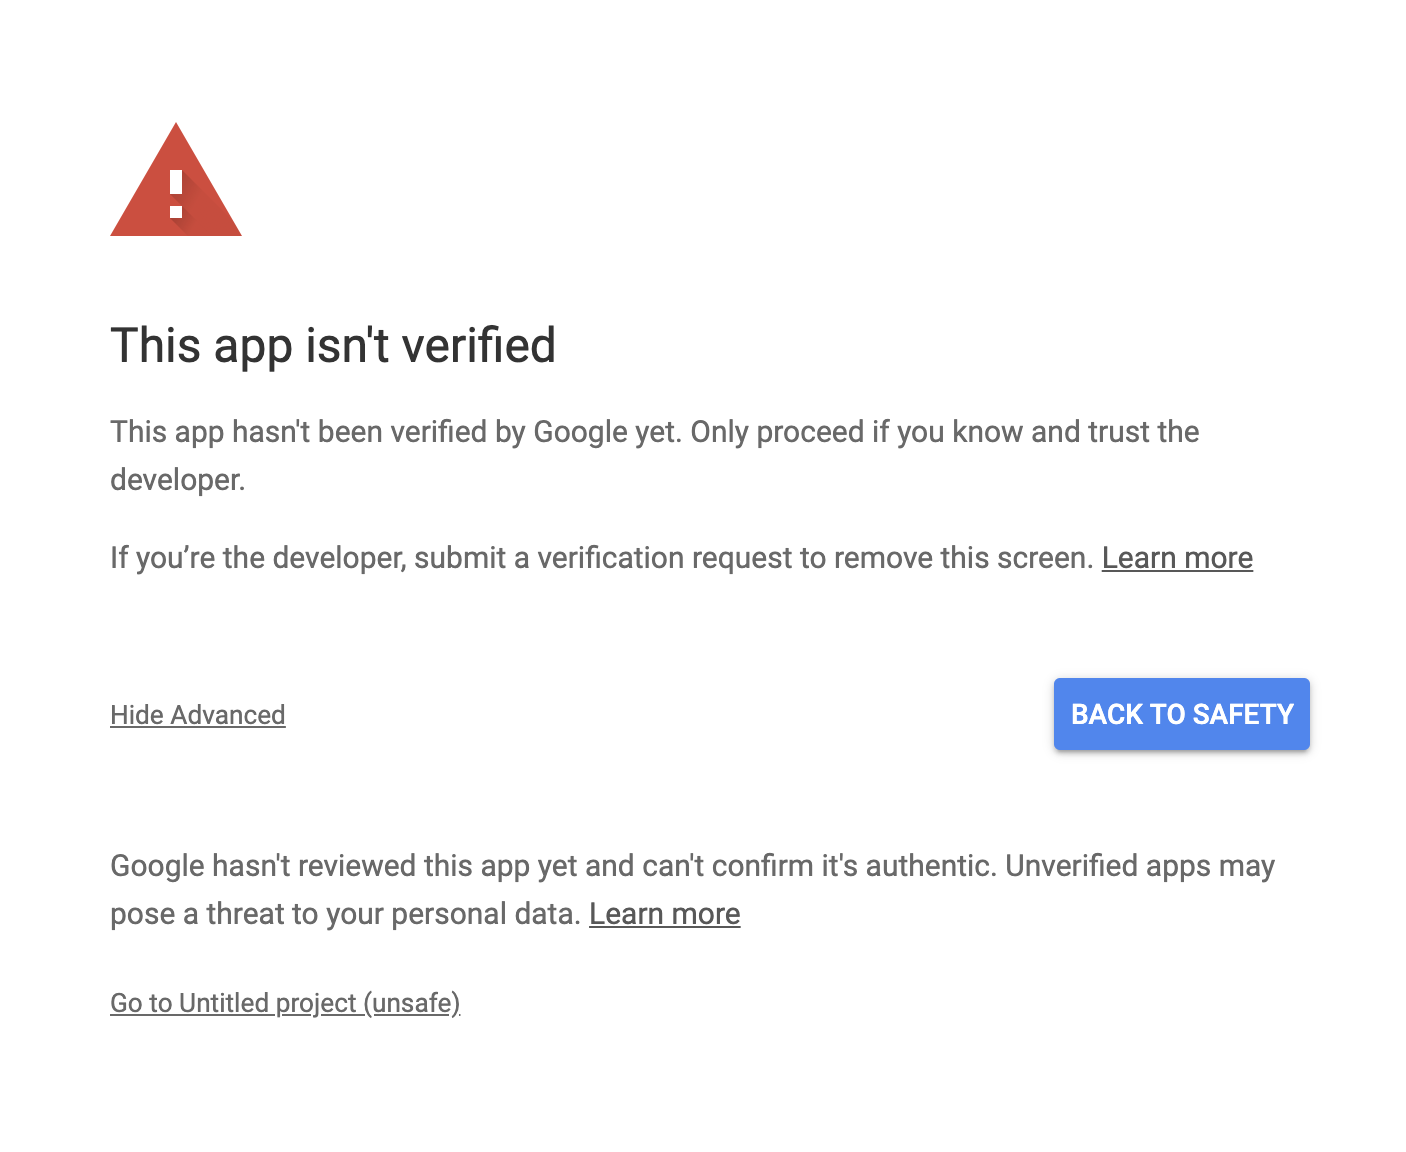
Select “Advanced” > “Go To (sheet-name) project (unsafe) “
Select your language and the sheet you would like FormEmailer to send emails about (usually the sheet containing your Google Form responses). Once you select the “Install” button, the script will setup it’s configuration and create a new sheet called “FormEmailer”. This sheet contains all the configuration for the script; please do not modify it directly.
Time-Trigger Installation
In order for FormEmailer to work properly, you must setup a “Time-trigger” to have this script run automatically in the background. Below are the steps to get this setup:
- Open your spreadsheet, and select “Tools > Script Editor” on the top menu. This should open a new tab titled “FormEmailer”
- On this tab, select “Edit > Current Project Triggers” on the top menu. This will also open a new tab.
- In this tab, click the “Add Trigger” button found at the bottom right.
-
A dialog will popup asking for a bunch of configuration values. You can use the values found below as defaults:
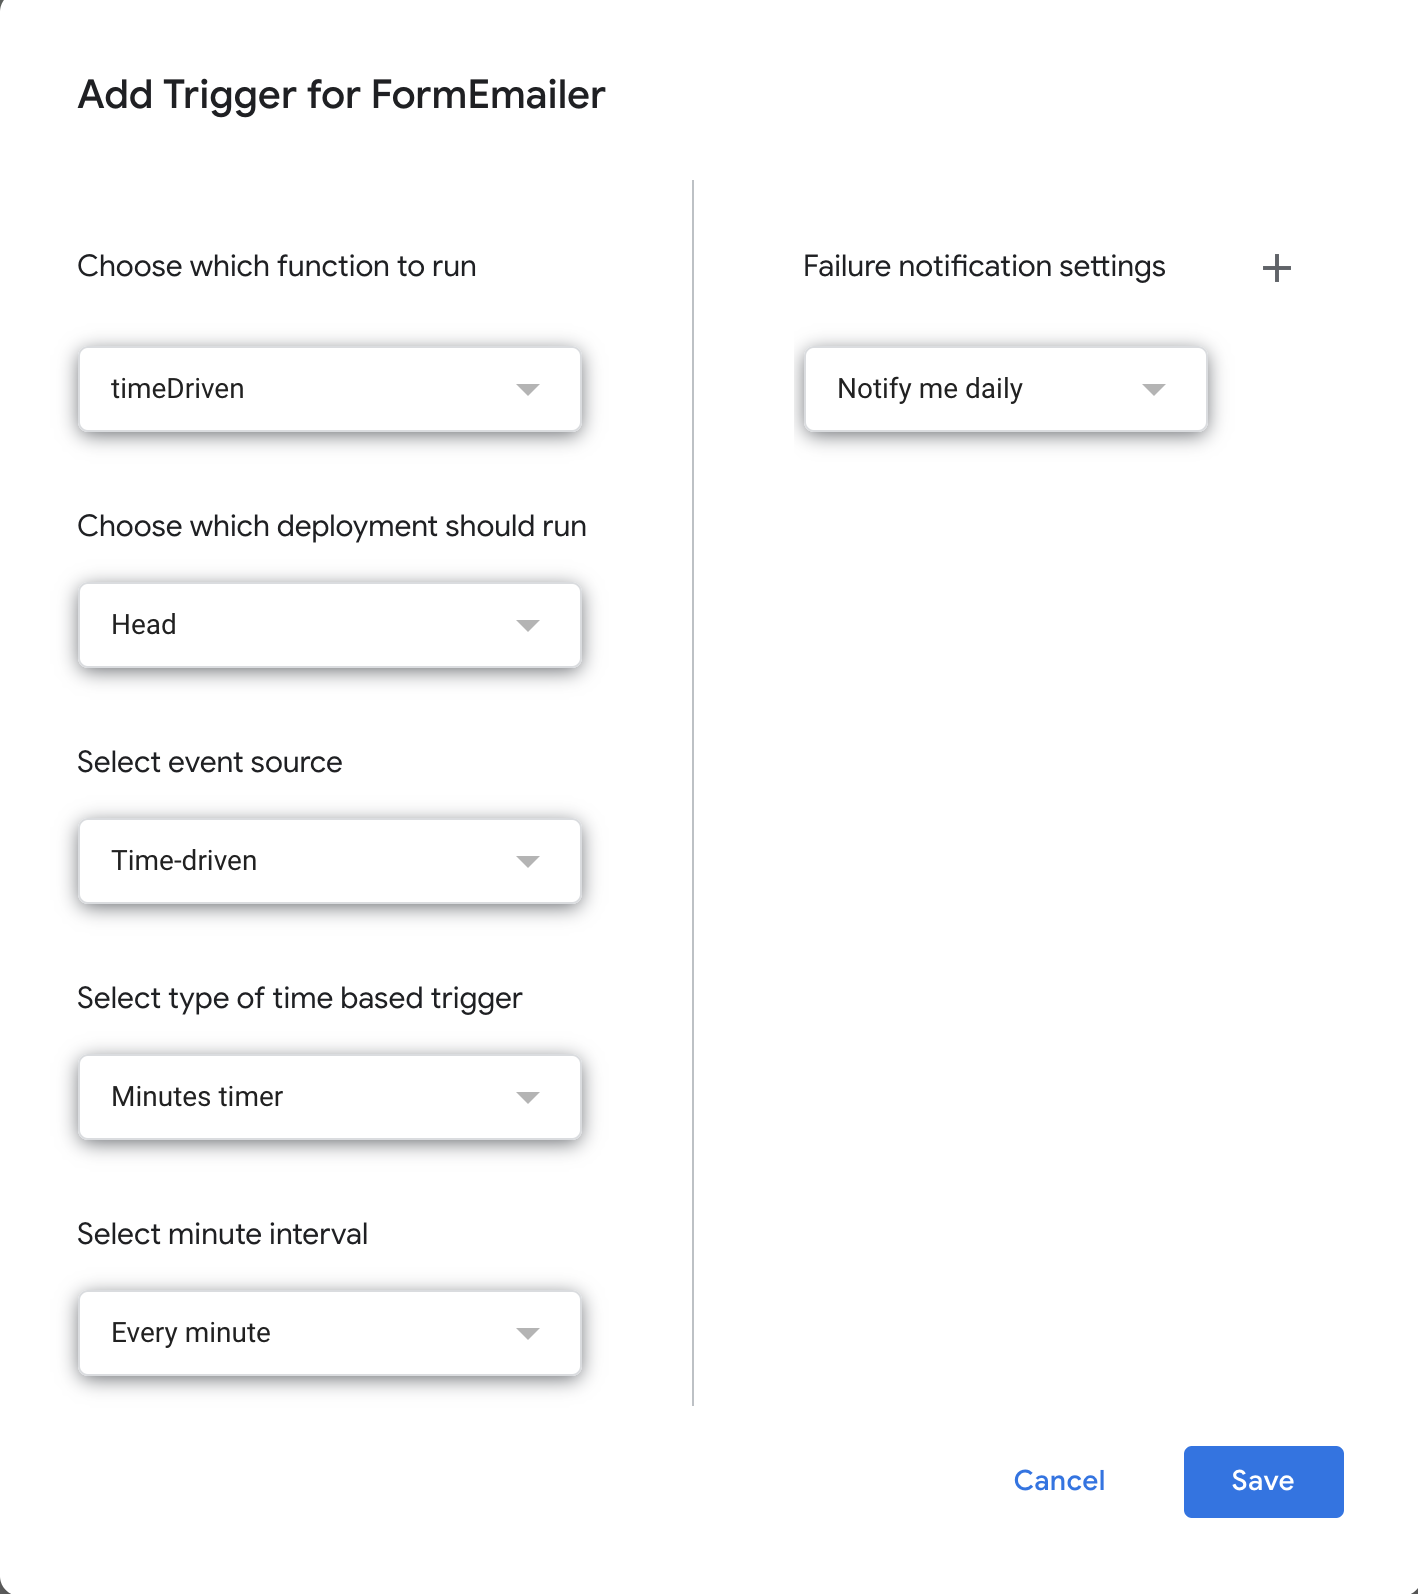 Note that you can change the “Select type of time based trigger” to have this script run autmoatically at any given time interval.
 - Select “Save” on the popup window
-
If eveything went OK, you should see the following row displayed:

- You can now close the two tabs that were opened, and refresh your spreadsheet.
Configuration
Once you have downloaded, installed and setup the time-trigger, you can now begin to configure FormEmailer. On your spreadsheet, in the top menu, select “FormEmailer > Settings”. A detailed explanation for each field is listed below.
Email Tab
- Sender Name - This is the display name that will appear when emails are sent out
- Reply To - This is the default ‘reply-to’ field if you hit “Reply” on FormEmailer emails
- To - Email to send FormEmailer emails to
- Cc - CC recipient(s) on FormEmailer emails
- Bcc - BCC recipient(s) on FormEmailer emails
- Subject - Subject line on FormEmailer emails
- HTML - Checkbox to determine whether your email “Body” contains HTML
- Body - Email body to be sent in FormEmailer emails. If “html” config option is set, this can contain HTML that will render prior to emails being sent out. You will also notice default values here: please refer to the “Formatting” section for more information
Advanced Tab
- Form Sheet - The sheet containing your Google Form responses. FormEmailer will generate emails from this sheet
- Qtt Emails - The number of emails you want sent out. Multiple email templates are supported (Note: To add another email template, change the number in this field, and select “Save and Close”. When you open FormEmailer settings again, you will see your new email tab.
- Quota Warning - Emails sent by FormEmailer are restricted by Google’s email quota limit (by default, this is 1500 a day). Quota warning will send a warning email out once this number of emails have been sent out by FormEmailer in a day.
- Quota Limit - When your daily email quota hits this number, stop sending emails for the day.
- Formulas Location - Please see the Formulas Location section
- Closure mode - Please see the Formulas Location section
- Remaining Quota - The quota remaining on your daily limit (100). This is a readonly field, for informational purposes only
Formatting
FormEmailer has several handy formatting tools built in. Below are common use cases
Variables in Email Template
After intial installation, you may have notcied that the “Body” under the Email tab in Settings contains HTML and variables surrounded by “#”’s. When emails are generated, any text surrounded by #’s will be replaced by the field in the corresponding cell. For example, if your sheet containing form responses has two response fields (“Name” and “Age”), your email template should contain “#Name#” and “#Age#” anywhere you want to insert this value into the email
Including Formats in your Template
If you would like to customize the format on your variables, you can use the following format: #placeholder|FORMAT#
You may have noticed some of these formats included in the default “Body” template. Below are more documented cases of formatting
Text Formatting
All text formats start with the letter, “s” (for string)
| Format | Short | Description | Example | | —— | —– | ———– | ——- | | sUpper | sU | transform all text to uppercase | “Name” > “NAME” | | sDown | sD | transform all text to lowercase | “Name” > “name” | | sProper | sP | all first letters will be uppercase and other others lowercase | “mY NAmE” > “My Name” |
Date Formatting
The script uses a built-in utility to do the date formatting. For more acceptable formats, you can take a look here
| Format | Result | | —— | —— | | MM/dd/yy | 04/09/19 | | M/d/yyyy | 4/9/2019 | | M/d/yy HH:mm:ss | 4/9/19 17:30:00 | | h:mm a | 5:30 PM | | EEEE, d ‘of’ MMMM-yyyy | Friday, 8 of April-2019 |
Number Formatting
Number format are built using the following logic, which may seem difficult at first, but once you get used to it, is very simple to use.
- If there’s a single character, it will be taken as the decimal separator (this is the only obligatory element).
- If there’s two characters, the first will be used as thousands separator and the second as the decimal.
- After the decimal separator, you can put a number to determine the amount of decimal points.
- A percent sign “%”, can be used as last char to have the number multiplied by a hundred (100).
- An open parenthesis “(“ may be used as 1st character to determine that negative numbers should be represented enclosed by parenthesis instead of the minus char (this is most used in financial representations).
The resulting construction of the parameter looks like this:
- [open parenthesis][thousands separator]decimal separator[number of decimals][percent sign]
| Raw Number | Format | Result | Explanation |
|---|---|---|---|
| 1500.35 | , | 1500,35 | changed the decimal separator to a comma “,” |
| 1500.35 | ,. | 1,500.35 | defined a thousands separator as “,” and the decimal separator as “.” |
| 1500.35 | .,3 | 1.500,350 | thousands separator as “.”; decimal separator as “,”; and 3 decimal numbers. |
| -23.5 | .0 | -24 | decimal separator as “.”; and no decimals. Remember that the definition of decimal separator is obligatory, even if it’s not going to show as in this example) |
| -23.5 | (.2 | (23.50) | negative representation as parenthesis; no thousands separator; obligatory decimal point; and fixed 2 decimals |
| 0.5 | .% | 50 | obligatory decimal point; and multiply the number by 100. |
| 52 | ( .3% | 5 200.000 | negative representation as parenthesis; a space as thousands separator; obligatory decimal point; 3 fixed decimals; and multiply by 100. |
Formulas Location
This feature is one that makes FormEmailer very flexible. The idea is to have the script read custom spreadsheet formulas written by you, and apply them to each row (when emails are being generated). This allows you to create complex scenarios that goes beyond simple mail merges. For example:
- To change the recipients of an email based on any rule (that you can write as spreadsheet formula, which can be really complex, depending only on your skills). e.g. You can get information provided in the form to lookup a table and retrieve a different recipient list. Or even no recipient, which to FormEmailer, means: do not send
- You can make calculations based on the users answers, to retrieve him scores or prices
- You can lookup the availability of a product or schedule to send a completely different email based on it
Here is a technical explanation of this feature (there’s an example below): You write your formulas on the row N2 (which is the 1st row with data, since row N1 is the header), I suggest you make this 2nd row a template only (but you can have real data too). The script will then copy these formulas down to the row being processed automatically. All you have to do is inform it, in the Formulas location parameter, where your formulas are. You’ll be able to use these columns as you use any other question (as they will be replaced by your ## variables). These formulas may even be in another sheet, which I only advise to experts, but use it at your convenience.
This parameter should be written like this: SheetName!StartColumn:EndColumn
Setup example: Let’s say that you have 4 questions, including the timestamp, so you’d have columns B to E filled with the answers, since the FormEmailer status is on column A. Then, you open up 2 more columns to fit your formulas, after the last answer (on column E). You’ll write your formulas on cells F2 and G2. You should also give proper names to these columns (filling out cells F1 and G1 with headers), so you can appropriately reference these variables with ##. The last thing missing is to inform the script to copy your formulas by filling the Formulas location parameter, which in this case should be: Sheet1!F:G “Sheet1” is just an example too, you should replace it with your actual sheet name. Save and Close to make sure it’s ok and then re-open to use the new placeholders.
Closure Mode
This parameter is only taken into account when the previous one (Formulas location) is being used. It’s used to determine what you want to be done with the formulas copied in the processing row. There’s 3 options:
- clear: deletes all copied formulas (after the sending the emails).
- values: replace the formulas with their results (useful to have a history and to “unload” the spreadsheet)
- formulas: leave the formulas there
Report Issues with FormEmailer
I have only recently taken over this project. As a result, you may encounter bugs; please submit your bugs in the “Issues” tab for this repository. I will respond as soon as I can (also, please share your google sheet with me)
Support this Project
I work on this project for free; if you would like to donate and support the continuing development of this project, you can go here: https://www.buymeacoffee.com/clyall